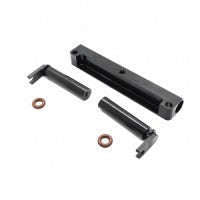
RCM-HRPP-M Horizontal Rear Post Body Mount Pro – 7075 Alu Mounts Only w/Screws RCMaker
$ 16,95 $ 10,17
Horizontal Rear Post Body Mounts Pro!
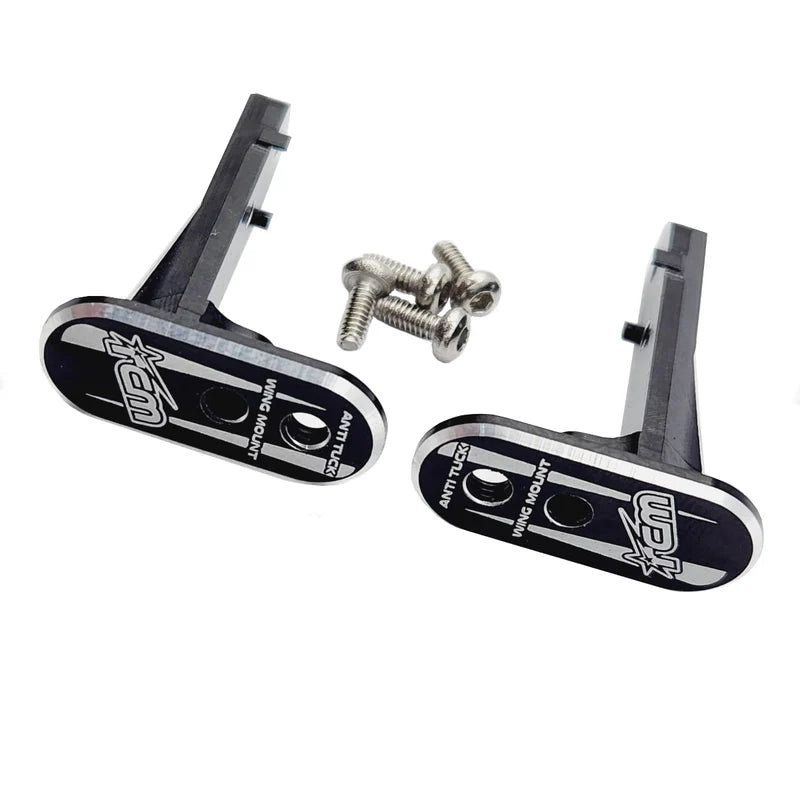
These are the MOUNTS ONLY – you must also buy the HRP Pro Carbon Extensions as well as these mounts. Available on the site.
We are really excited to present our new Ultra Lightweight (6.5g/pair) revolutionary Body Mounting System for use with Horizontal Rear Body Posts!
Our original HRP Lite system has taken the world by storm, with thousands of racers opting to mount their bodies the better way! After months of feedback from drivers around the world as well as our team drivers consisting of the likes of Marc Rheinard, Yannic Prumper, Akio Sobue and Nicholas Lee, we set out to further improve on what was already a great product.
Developing the new HRP Pro!
Now that we had the light weight, we wanted to add the durability that will make these body mounts survive even the nastiest of crashes. We also wanted to make them more user friendly to install and adjust. After months of testing and development, we understood that our new HRP Pro needed to be based around a US Grade 7075 Aluminium mount. With built in threads, incredible durability and minimal weight, it was clearly the way forward for our HRP System.
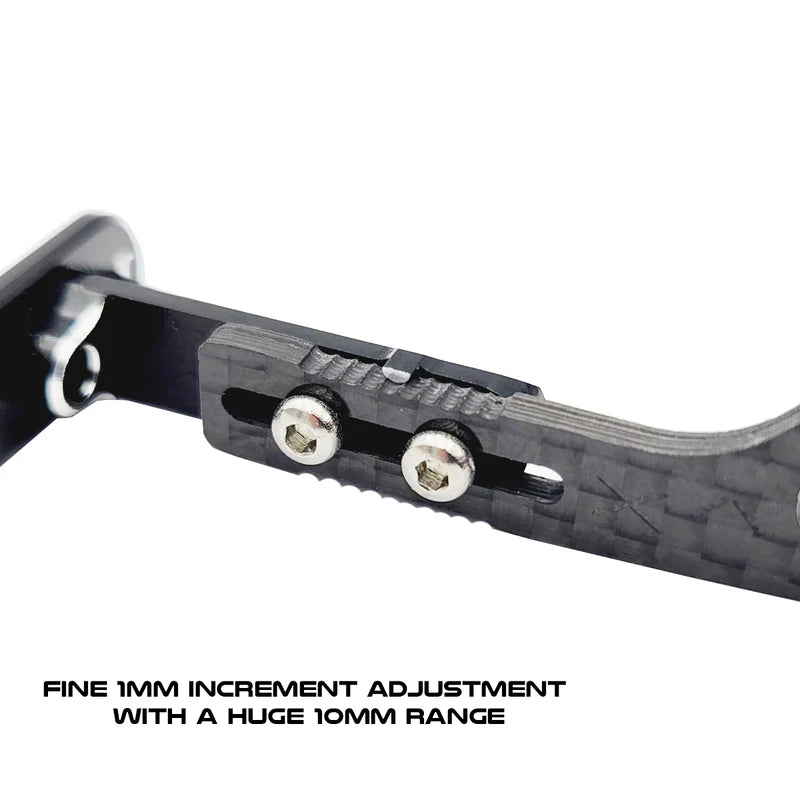
We then added locating pins which allows the HRP Pro do be adjusted in 1mm increments, and also stops it moving if the screws happen to come loose. On top of this, it also helps you to get them even left to right!
Lastly, we re designed the carbon bracket to accommodate these locating pins, and also added more material around the body mount hole for improved durability. We opted for “1mm Play” – meaning the holes are now oval with a small amount of vertical play to allow the car to flex and move under the body over curbs and bumps.
Benefits of our HRP Pro
The handling benefits of horizontal rear body posts are unquestionable. The downforce leveraged onto the back of the bodyshell creates significant benefits to handling, by increasing the downforce distributed to the chassis, as well as making the body more attached during left and right transitioning.
However, some major issues of this system are durability, stiffness and adjustability.
Durability: The holes in lexan are always close to the skirt, meaning it’s quite easy to tear them out or damage the holes in even the smallest of accidents.
Stiffness: This area of the body is very thin and can flex under load, not as efficiently distributing the downforce.
Adjustability:The height adjustability of the body relies solely on the attachment to the chassis, which may not be in fine increments or easy to adjust.
Our new Horizontal Rear Post Body Mounting Set improves on ALL of these areas!
Durability is significantly increased, due to now not having any holes in the rear of the body at all. The connection is made via the 2mm thick carbon extension and 7075 Aluminium mount which connects directly to the wing strut.
Stiffness is drastically improved now via the body being mounted to the car via a solid, extremely stiff combination of carbon fibre and 7075 Aluminium. This provides maximum downforce transfer to the rear of the car, ensuring the aerodynamics of the body/wing is transferred to the car in its full potential. Use our 7075 Ultra Lite Touring Car Wing Buttonsfor maximum rigidity of your HRP PRO found.
Adjustability is paramount, and our HRP Pro are able to be adjusted in 1mm increments with a total 9mm of travel. Simply loosen the screws, slide the carbon extension up or down into the other notches, tighten firmly. It’s important to note that these do not need tightening as much as previous versions, due to the locating lugs preventing moving in crashes.
All of this provides you with an absolutely perfect solution to transfer the maximum amount of downforce to your car, whilst keeping the body more rigidly secured to the rear of your car than ever possible before. The assembly is very strong, ensuring you are able to stay on the track in crashes, and not having to replace bodyshells just because the holes have been damaged or torn out. The adjustability offered by these mounts is a necessity to be able to tune the rake and height of your body.
Our new Horizontal Rear Post Body Mounting Set Pro can be transferred body to body, and securely attaches your wing, as well as bracing the wing strut to protect against deforming in high speed and in crashes.
The best part is, it makes body mounting an absolute breeze! No more rear holes at all, simply get your front holes correct and screw the mounts on! We recommend using body pins either side of the carbon to ensure maximum rigidity.
Compatible Bodies for the HRP Pro
The HRP Pro Mounts will fit the Xtreme Twister & Twister Speciale, all Zoo Racing Bodies, LensBodies as well as the Protoform P63.
These are the MOUNTS ONLY – you must also buy the HRP Pro Carbon Extensions as well as these mounts, Available HERE
Features:
- Improved downforce, durability, stiffness, appearance and adjustability
- Weighs in at only 6.5g for the pair with extensions and hardware
- Fits all Zoo Racing and Xtreme, LensBodies, Bittydesign Hyper HR and Blitz Roadster Bodies
- Fits all the most popular touring cars on the market
- No holes required in the body for super easy body mounting
- 7075 Black Anodized Aluminium mounts for maximum strength and minimum weight
- Includes mounting hardware, but NOT carbon extensions required for use (Available Here)
Installation Instructions
Attach Carbon HRP Pro Extensions (sold separately) onto 7075 Alu HRP Pro Wing Mounts into the desired height and tighten M2 screws firmly. Ensure the arrows engraved on the carbon extensions are facing the outside of the car, one will be on the front side, one will be on the back side if installed correctly. This will offset both carbon extension holes outwards
Drill a hole in the wing strut that corresponds with the HRP Pro Wing Mount Thread. Install the wing mounts into the wing strut and fasten the wing. We suggest using our 7075 Ultra Lite Touring Car Wing Buttons for this as they follow the profile of the mount and provide extra rigidity. Plus they look great!
Once installed, loosen M2 screws in the extensions and adjust the body to your desired height, and tighten firmly.
Add body pins or adjusters as a front stop so the extension cant slide forwards on the post too much, and trim the body post so theres 2-3 holes protruding behind the mount to insert body pins.
Fast Shipping with Professional Packaging
We provide a variety of shipping options thanks to our long-running partnerships with UPS, FedEx and DHL. Our warehouse staff are trained to pack your goods exactly according to the specifications we provide. Prior to shipping, your goods are thoroughly inspected and secured. We deliver to thousands of customers every day from all over the world. This is a sign of our commitment to be the largest online retailer globally. We have distribution centers and warehouses in Europe and the USA.
Note: Orders with multiple items will have a different processing time for each item.
We will inspect each and every one of the products before they are shipped. The majority of orders will be sent within 48 hours. The expected delivery time will be between 3-7 days.
Returns
We don't manage the stock in our warehouse or factory. The actual stock levels can fluctuate at any point. It is possible that stocks could be depleted after your order has been placed.
Our policy is valid for a period of 30 days. If it's been more 30 days since the date you made your purchase, we unfortunately can't give you a full refund or exchange.
You can only return a product when it's unopened and still in the same condition as when you first received it. You must have the item in its original packaging.
Related products
parts
